
TM 5-3800-205-23-1
AUXILIARY FUEL TANK REPAIR - CONTINUED
0167 00
DISASSEMBLY - CONTINUED
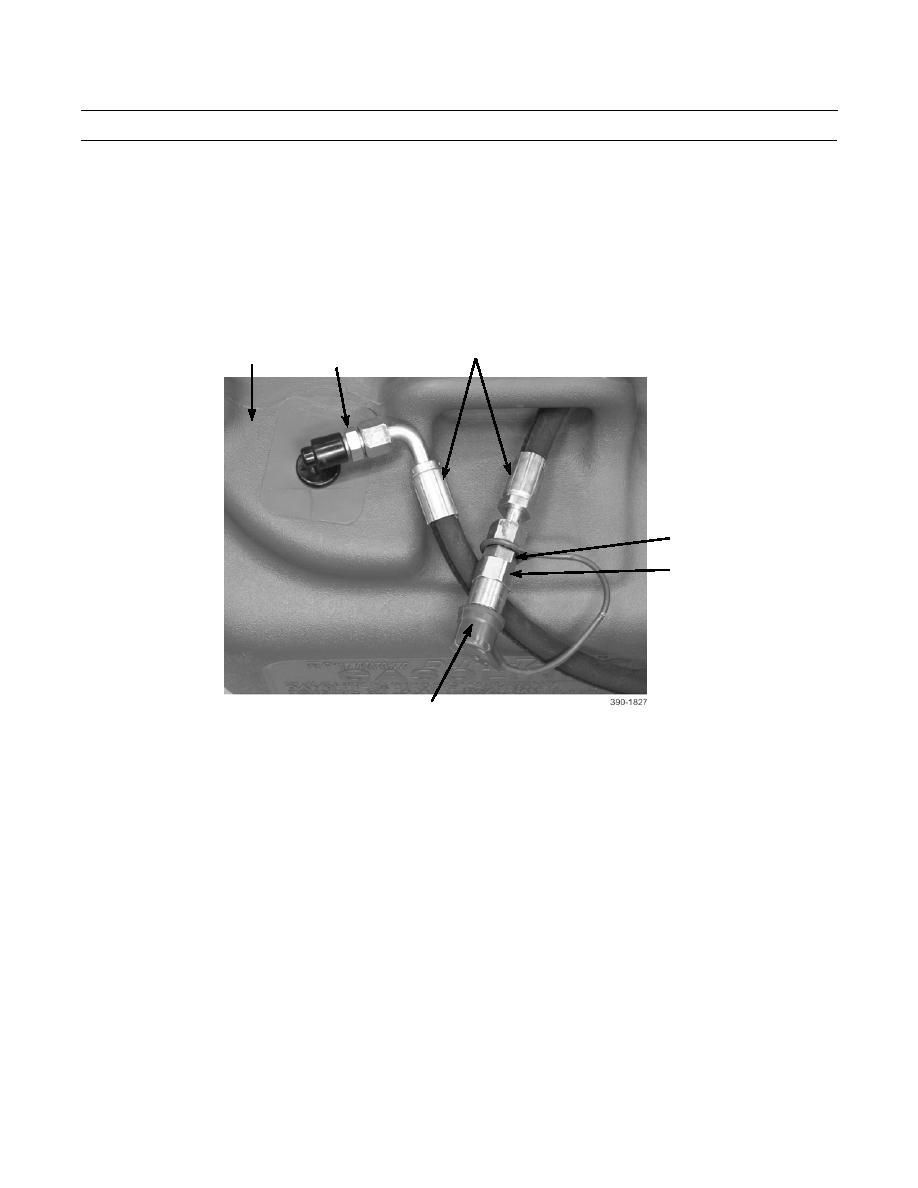
3.
Remove dust cap (11) from coupler (9).
4.
Remove coupler (9), O-ring (10), adapter (7), O-ring (8), and dust cap (11) from hose (6). Discard O-rings.
CAUTION
Use line wrenches to disassemble fittings, to avoid damage to fittings.
5.
Remove hose (6), O-ring (5), and adapter (4) from fuel tank (1). Discard O-ring.
6
1
4,5
7,8
9,10
11
INSPECTION
1.
Inspect fuel tank for leaks, cracks, and dents. Replace fuel tank if it leaks, is cracked or dented.
2.
Inspect hose for wear, cracks, and damage. Replace hose if worn, cracked or damaged.
3.
Inspect coupler and adapters for damage. Replace connector or adapters if damaged.
4.
Inspect cap for cracks and damage. Replace fuel tank if cap is cracked or damaged.
ASSEMBLY
CAUTION
Use line wrenches to assemble fittings, to aviod damage to fittings.
1.
Apply a thin coat of sealing compound to threads of adapter (4) and install adapter on fuel tank (1).
NOTE
Lightly coat new O-rings with clean fuel before installation.
2.
Install new O-ring (5) and hose (6) on adapter (4).
0167 00-2

