TM 5-3805-248-23-1
ELECTRICAL GENERAL MAINTENANCE INSTRUCTIONS - CONTINUED
0018 00
ELECTRICAL SYSTEM COMPONENTS AND WIRING - CONTINUED
h.
Do not tighten clamps or install tiedown straps on replaced harnesses until entire harness is installed and posi-
tioned.
15.
System Testing.
After you install a harness, always test the harness by operating the system it is in.
16.
Anti-Chafing Sleeves.
Make sure all tubes, hoses and metal-braided electrical cables are protected against chafing (rubbing) on one another. If
they cannot be repositioned, install anti-chafing sleeves in the area where rubbing could occur. In areas where tiedown straps
are used to hold metal-braided electrical cables to tubes or hoses, anti-chafing sleeves will be used as required.
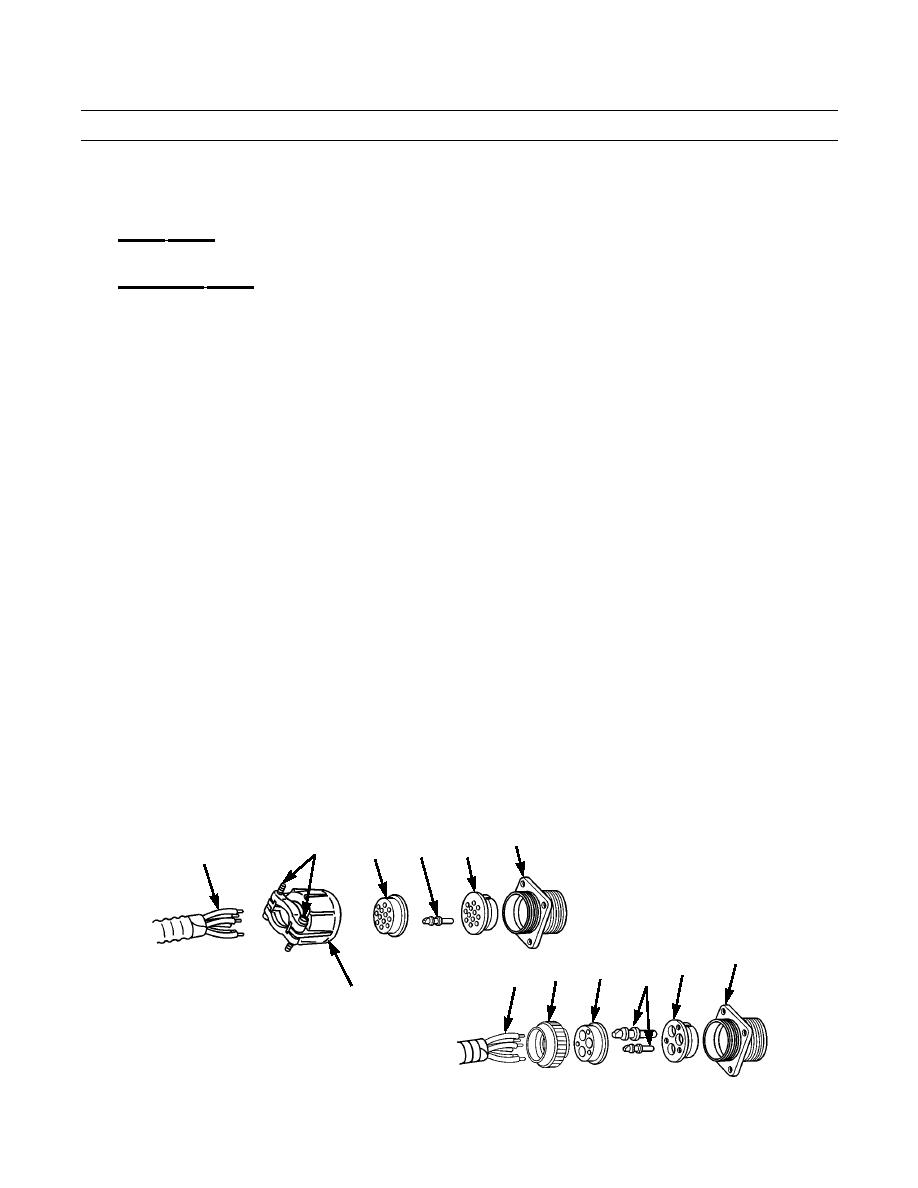
MULTIPLE-PIN CONNECTOR REPAIR
NOTE
Use electrically conductive grease on unprotected (exposed to weather) electrical connectors
before connections are made.
Use electrical insulating varnish on all electrical connections that are mounted outside of
machine and are exposed to harsh weather and/or spray from the ground.
Tag and mark position of wires in electrical connector to ensure correct installation.
1.
If repairing a trailer electrical connector, loosen two screws (1) on nut (2).
2.
Unscrew nut (2) from shell (3) and slide nut back over wires (4).
3.
Push grommet (5) back on wires (4).
4.
Using pin extractor, push pins (6) out through rear of insert (7).
5.
Push insert (7) out through rear of shell (3).
6.
Unsolder wires (4) from pin(s) (6). Discard pin(s).
7.
Position wires (4) into solder wells of new pins (6) and solder.
8.
Push insert (7) into shell (3) from rear until seated. Groove in insert must be aligned with guide in shell to ensure proper
fit.
9.
Push pins (6) into insert (7) from rear until seated.
10.
Push grommet (5) down wires (4) and over solder wells of pins (6).
11.
Install nut (2) on shell (3).
12.
If repairing a trailer electrical connector, tighten two screws (1).
3
1
7
6
5
4
3
7
5
2
6
4
2
394-1740
0018 00-9


