
TM 5-2350-377-13&P
FIELD MAINTENANCE
HEADLIGHT ASSEMBLY REPLACEMENT
INITIAL SETUP:
Tools and Special Tools
Equipment Condition (cont.)
Tool Kit, General Mechanic's: Automotive
Hydraulic pressure relieved (TM 5-2350-262-20)
Negative battery cables disconnected
(WP 0071, Table 1, Item 7)
(TM 5-2350-262-20)
Wrench, Torque, Click, Ratcheting, 3/8 in. Drive
(75 ft-lb) (WP 0071, Table 1, Item 13)
Personnel Required
Construction Equipment Repairer, 91L
Equipment Condition
Front of vehicle blocked (TM 5-2350-262-20)
REMOVAL
CAUTION
Do not turn or twist headlight during installation. Turning or twisting headlight can damage
headlight wiring harness.
NOTE
Installation procedures for the headlight are the same for both sides of the vehicle. The right
side is shown here.
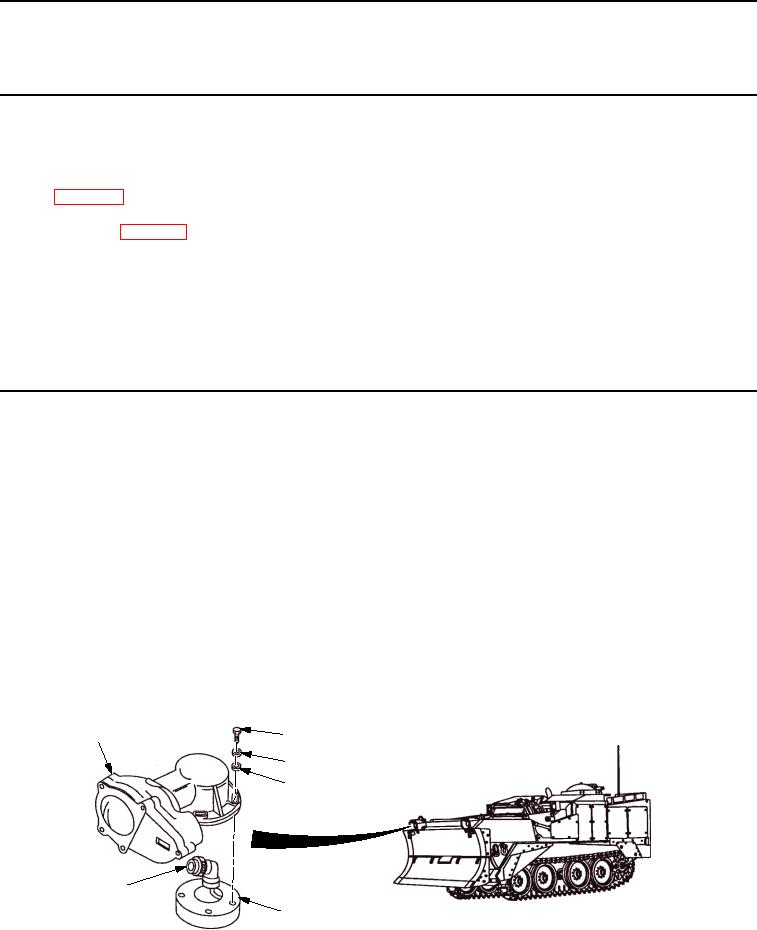
1.
Remove four bolts (Figure 1, Item 2), washers (Figure 1, Item 3), and flat washers (Figure 1, Item 4) from
headlight (Figure 1, Item 1) and apron (Figure 1, Item 5).
2.
Carefully lift headlight (Figure 1, Item 1) a few inches from apron (Figure 1, Item 5) to get at connector
(Figure 1, Item 6).
3.
Disconnect connector (Figure 1, Item 6) and pull away from headlight (Figure 1, Item 1).
2
1
3
4
6
5
M0003HBF
Figure 1.
Headlight Removal.
END OF TASK
03/15/2011Rel(1.8)root(maintwp)wpno(M00003)