
TM 5-2350-377-13&P
FIELD MAINTENANCE
HEADLIGHT MOUNT REPLACEMENT
INITIAL SETUP:
Personnel Required
Tools and Special Tools
Construction Equipment Repairer, 91L
Tool Kit, General Mechanic's: Automotive
(WP 0071, Table 1, Item 7)
Stand, Vehicle (WP 0071, Table 1, Item 6)
Equipment Condition
Wrench, Torque, Dial, 1/4 in. Drive (30 in-lb)
Front of vehicle blocked (TM 5-2350-262-20)
(WP 0071, Table 1, Item 14)
Negative battery cables disconnected
(TM 5-2350-262-20)
Hydraulic pressure relieved (TM 5-2350-262-20)
Materials/Parts
Headlight incandescent lamp removed (WP 0033)
Washer, Lock (WP 0055, Figure 10, Item 6)
Qty: 3
REMOVAL
NOTE
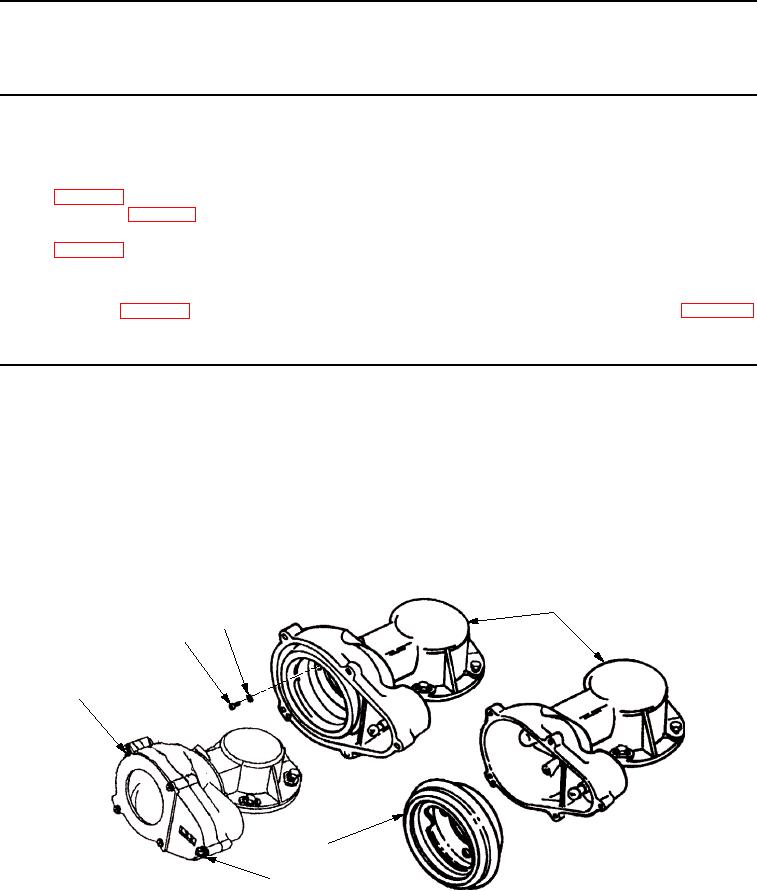
Use this task to replace left or right side headlight mount. Right side headlight mount is shown.
1.
Remove five screws (Figure 1, Item 5) from headlight cover (Figure 1, Item 6). Remove cover.
2.
Remove three screws (Figure 1, Item 1) and lockwashers (Figure 1, Item 2) from body (Figure 1, Item 3).
Discard lockwashers.
3.
Pull out headlight mount (Figure 1, Item 4) from body (Figure 1, Item 3).
3
2
1
6
4
5
M0015HBF
Figure 1.
Headlight Mount Removal.
END OF TASK
03/15/2011Rel(1.8)root(maintwp)wpno(M00007)