TM 5-3800-205-23-2
FLOOR CHECK VALVE REPLACEMENT - CONTINUED
0030 00
REMOVAL - CONTINUED
1.
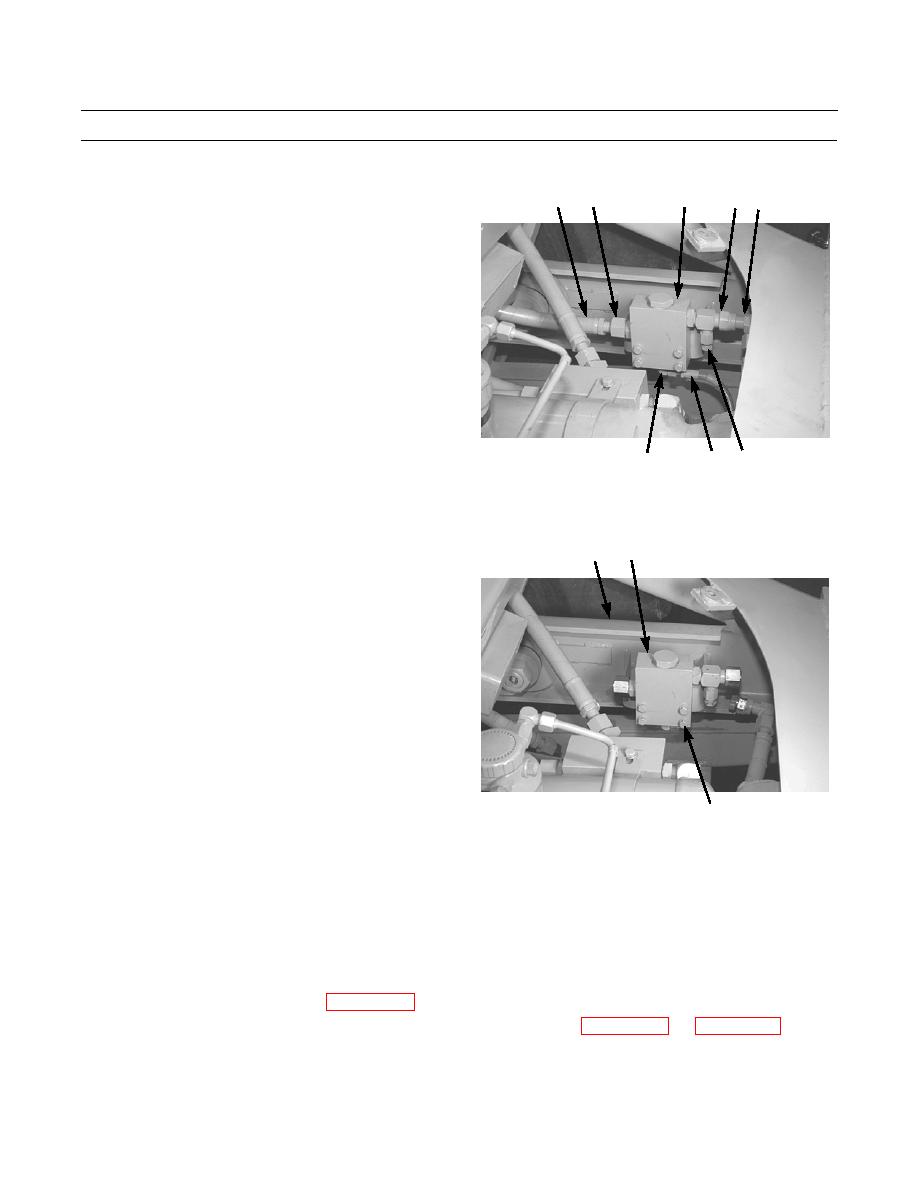
Loosen relief valve (10) and relieve pressure in
2
1
3
4
5
hydraulic circuit.
2.
Loosen retaining nut (4) and disconnect hose (5) from
floor check valve (3). Install protective cap on hose.
3.
Loosen retaining nut (2) and disconnect hose (1) from
floor check valve (3). Install protective cap on hose.
4.
Loosen retaining nut (8) and disconnect hose (7) from
floor check valve (3). Install protective cap on hose.
390-751
6
8
7
5.
Remove four bolts (10) and floor check valve (3) from
frame (9).
3
9
NOTE
Note position of fittings to aid in installa-
tion.
6.
Remove fittings and O-rings from floor check valve
(3). Discard O-rings.
390-752
INSTALLATION
10
1.
Lubricate new o-rings with clean hydraulic oil and install o-rings and fittings on floor check valve (3) in same position
as removed.
2.
Install check valve (3) on frame (9) with four bolts (10).
3.
Remove protective cap from hose (7). Position hose on floor check valve (3) and tighten retaining nut (8).
4.
Remove protective cap from hose (1). Position hose on floor check valve (3) and tighten retaining nut (2).
5.
Remove protective cap from hose (5). Position hose on floor check valve (3) and tighten retaining nut (4).
6.
Connect quick disconnects at right side of draft arms (TM 5-3800-205-10-1).
7.
Install toolbox and rear deck cover (WP 0017 00).
8.
Check hydraulic oil level. Add hydraulic oil as required (TM 5-3800-205-23-1, WP 0009 00 and WP 0010 00).
END OF WORK PACKAGE
0030 00-2


